0 Comments
 Total
Total84
59
23
+25
386
10:12
24
3
+8%
Teams advantage Dust II (M0)
Records Dust II
Record/Time/Map
Val/Avg
Set by
Rival
Rounds win streak
103


AWP kills on a map
166.5798


AWP damage (avg/round)
70.621.6


Flash blinded on a map (opp)
5930


Flash duration on a map (sec)
01:27s00:39s


Flash blinded on a map (opp)
6530


Flash duration on a map (sec)
01:20s00:39s


Flash blinded on a map (opp)
6030


AK47 kills on a map
146.732


Galil kills on a map
51.8064


Info
Map Analysis of RBG vs Bad News Bears by the Bo3.gg Team
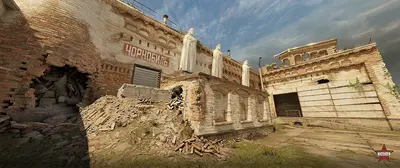
Bad News Bears on Dust II Analysis
Bad News Bears demonstrated their prowers on Dust II, securing 16 out of 23 rounds, showcasing their ability to control and adapt to various situations on this specific map. Victory on this map contributed to their overall success in the match.
The standout players for Bad News Bears on Dust II were Swisher, who contributed 24 kills, and Junior, who added 21 kills to the team's efforts. Their exceptional skills and coordination were instrumental in securing the map win. Throughout the match on Dust II, the team inflicted a total of 8879 overall damage.
On the defensive side of Dust II, Bad News Bears held their ground firmly, successfully defending 3 bomb plants. Their defensive coordination and site control on this map proved to be crucial in their victory.
RBG on Dust II Analysis
Dust II proved to be a challenging battleground for RBG, as they managed to secure 7 out of 23 rounds on this map. Adapting to their opponent's strategies on this particular map presented difficulties for them.
The standout players for RBG on Dust II included HexT, who contributed 14 kills, and jitter, who added 13 kills. Despite their individual efforts, inflicting 6915 total damage, RBG couldn't prevent Bad News Bears from securing victory on Dust II
On the defensive side of Dust II, RBG struggled to hold their ground, successfully defending 2 bomb plants. Their defensive coordination faced challenges on this map, making it difficult to maintain site control.


Comments